Sunday 13 November 2011

Well, the finishing touches are now being applied to my very first E-Book - Ocean Theme Party Food! Those of you who have been following the blog for a while might remember the post on my daughter's birthday party back in April. I've had so many remarks on the food that I decided to compile all of the photos and recipes together in one spot in an easy to follow step by step fashion. There are heaps of photos, lots of cute pictures, and I'm also working on a coordinating game pack and stationery set to boot! Stay tuned over the next couple of weeks as I start to roll it all out. As a little teaser though, here is a preview of the cover....

[caption id="attachment_1561" align="aligncenter" width="481" caption="Cover of my first E-Book "Ocean Theme Party Food""]Cover of Ebook Ocean Theme Party Food[/caption]

Monday 26 September 2011

Hi all,
I know there has been all sorts of confusion and lots of stories flying around as to what, when and where you can find me. First up, I'd like to send out a big "Thank You" to Kim Towner of Happy Frog Coffs Harbour who also runs the Harbourside Markets. Aside from being an Awesome Business Woman, and a Mentor of Mine, I would first of all like to say "Thank You" for the opportunities and wisdom you have imparted on me. I follow in your footsteps, and one day aspire to be even half the businesswoman you are. Next is a big Thank You to all of my friends and totally awesome customers who have really come to the fore this week and shown your support. You are ALL AMAZING PEOPLE and it is because of you I am here. Ange, Bettina, Amanda, Elayne, Kristy, Ashleigh, Dena and everyone else, thank you so much for your support. You can't even begin to imagine the strength you give me.
For everyone else who is wondering where I have disappeared to on a Thursday, here is the story.
I turned up last week to set up my market stall at the Grower's Market to be told by the Council Representative that other Stall Holders had been complaining that their sales were down and therefore I could no longer participate. My only redress is that I am the only person selling cupcakes, friands and macarons, and am certainly the only business (as far as I know) in the Coffs Harbour Region offering exclusively Gluten Free goods. As my clientele are either Coeliac or Gluten Intolerant, they cannot purchase from the other sellers of baked goods, therefore, I do not see that I am any kind of competition. In addition to this, I am from Nana Glen, within the Coffs Harbour Shire. To my knowledge, the other sellers of Baked Goods at the Coffs Grower's Markets are from Grafton and Bowraville, both outside of the the Shire, which makes me the only "local" business. I have no desire to oust them, I wish only to sell in addition to them. I truly believe the marketplace to be big enough for us all. However, the Coffs Harbour Council has decided (in spite of it's written rules) to give preference to out of town businesses over their local businesses. As such, I am now only available at the Sunday Harbourside Markets.
I would like to take this opportunity to thank each and everyone of my awesome customers for not only your business, but your friendship and the joy you bring to my day.
Good luck, and I will see you on Sunday under the trees by the Yacht Club!
Best Wishes,
Cindy

Super Moist Chocolate Cake

This particular cake is also known as Devil's Food - I'm guessing because it is so wickedly delicious!!!


Super Moist Chocolate Cake


Recipe Type: Cake

Prep time: 5 mins

Cook time: 20 mins

Total time: 25 mins

Serves: 24

Ingredients


  • 2 cups Sugar

  • 1 teaspoon instant coffee

  • 1/4 teaspoon salt

  • 3/4 cup Cocoa

  • 2 cups Gluten Free Plain Flour

  • 1 teaspoon Gluten Free Baking Powder

  • 1 teaspoon Bicarbonate of Soda

  • 250ml Hot Water

  • 250ml Milk

  • 250ml Oil

  • 2 Free Range Eggs

  • 5ml Vanilla Extract


Instructions


  1. Place sugar, salt and coffee in a mixing bowl. Add sifted cocoa, flour, baking powder and bicarb. Add water, milk and oil. Mix on slow to wet the ingredients, then increase speed to medium and mix for 2 minutes.

  2. Add eggs and vanilla, mix on medium for a further 2 minutes

  3. Place into cupcake cups and bake for 20-25 minutes or until an inserted toothpick comes out clean.

  4. Cool on a rack. Enjoy!


Wednesday 17 August 2011

Big News!!!

Finally I can announce the exciting new news!  In addition to being at the Harbourside Markets (click here for a map, or here for directions) every Sunday with our range of Cupcakes, Friands & Macarons, we will be starting at the Coffs Harbour Grower's Markets (click here to see a map) next Thursday 25 August 2011 and will be exclusively GLUTEN FREE!  Can't wait to see you there!

[caption id="attachment_1286" align="aligncenter" width="300" caption="Under the trees at the Harbourside Markets"]photo of the market stall[/caption]

Sunday 14 August 2011

Harmony Day 2011

Having spent 9 years of my childhood living overseas in various countries, multiculturalism is a subject very close to my heart. I was fortunate to grow up with friends from all over the world, many of whom I still keep in touch with today. At the International Schools that I attended, United Nations Day was one of the biggest and most anticipated celebrations of the year. We all wore national costume (there were almost 70 nationalities at the schools) and the parents set up stands with traditional foods from their own countries for all us kids to try. (Funny how few people actually enjoyed our vegemite sandwiches though!) Now that I have 2 young children of my own, I work hard to instil empathy and appreciation of other cultures in them. I really think that understanding other cultures helps to prevent cultural disharmony, and I think that food is one of the best vehicles to cross the divide.

Two years ago when my youngest daughter was at the Nana Glen Preschool, I was introduced to Harmony Day when they put on a special lunch. The Mum’s were asked to bring in a plate of food from their own heritage. Not having grown up on traditional Aussie tucker, I decided to take in mini cupcakes each with a different coloured person on top, in keeping with the Harmony Day posters. Being cake, and brightly coloured, they were a big hit with the kids.

This year, I was lucky enough to be able to provide the Coffs Harbour Library with mini cupcakes for their Harmony Day Family Morning Tea and Story Time. Also, a very dear friend of mine who works at Southern Cross University invited me to be involved with their celebrations. Another big fan of cupcakes (let’s face it…who isn’t!) she thought that cupcake decorating would be a great way to bring people together. So, I baked 100 chocolate and vanilla cupcakes, made a mountain of icing and we went and bought a stack of lollies and sprinkles. We set up a couple of big tables and let the students go for it. It was fantastic! They all had a ball. It was such a hit in fact, that we made the local news with NBN reporter Clare Deligny even decorating a cupcake for the camera! Check out the video here!

I took lots of photos of all the marvelous cupcake creations and their artists, so if you were there on the day, have a look here for your photo and feel free to send a link to all of your friends! Also send me your name and I’ll tag you in the photo.

Happy Harmony Day everyone!

Wednesday 6 July 2011

Cupcake Cuties

Have you heard of Pinterest? It is an awesome site full of cool pics. You can create your own virtual "pinboards" with pictures you find on the net. It is a great place to go for inspiration, but also just as a "happy place". I love it. Today I thought I might share a few cute cupcake pics I found on there.


This one makes me want to get out in the garden and start digging!


Talk about elegance plus!


Source: flickr.com via Orara on Pinterest


These definately bring out the inner child!


Source: etsy.com via Orara on Pinterest


Now THAT'S what you call an apple for the teacher!


Source: google.com via Orara on Pinterest


I WANT!! I WANT!!! I WANT!!!!


Kiss me honey!


What cool cupcake finds have you stumbled across lately?

Wednesday 4 May 2011

Ah, my little baby is growing up so fast.  Last month she turned 6 and opted for an ocean theme for her party. 

044

I always let them pick an idea for a cake and then try to plan the party around it.  The invites were a bit rushed this year as we had to quickly get them out before the school term finished for Easter, so we went shopping and found some preprinted computer paper with seashells along the top and bottom.  Whatever effort didn’t go into the invites however, definately went in to the food.  We had a great time thinking up different foods and how to present them to keep with the ocean theme.  The girls decorated the house for the party with blue, green, white and pink balloons and streamers, and they coloured in a couple of fish pictures which they then cut out and stuck around the place too.

So where do I begin with the food?  I suppose the cake has to take centre stage really!  We used it as a centrepiece on the table and the Birthday Girl decorated all by herself!  She had a great time and weren’t all her friends impressed!  I stacked the cakes and covered them with blue icing with a rough finish to try and look like the surface of the water, then she went to town with some icing shapes I had left over from a wedding cake, and some of the food we had made for the party.  Clever girl isn’t she! 

2017

For the savouries, we had cheese sandwiches cut in the shape of fish (with a cookie cutter), Mermaid Bars of Gold (fish fingers), Octodogs (cheerios with one end cut – forgot to get a photo so will make them again and add them to the post down the track), Sea Cucumbers (gherkins sliced in half) and cute little Turtles made from Puff Pastry and Meatballs.

045

When it came to the sweets, we went all out.  I’m usually pretty strict on what I let the girls eat, but when it comes to Birthday Parties, I don’t worry about it. 

039    042    040

We had Homemade Marshmallow Dolphins, Clam Macarons, Fish Eggs (round lollies), Chocolate Orca Biscuits, glittery Seashell Shortbread, Anemone Meringues, Jellyfish (jellies set in plastic shot cups turned upside down on lolly snakes which had been sliced in from each end) and the cutest ever Fishy Cupcakes with gorgeous little fish lips!

033    038    037

All in all, I’m not sure whether the kids enjoyed eating it more, or I enjoyed making it more!  It was an awesome day despite the rain pouring down and having to hold it inside (which is why the lighting is so bad).  I’d love to hear some comments and see some photos of any ocean theme parties you have organised or been to!

035

Oh yeah, and just so you know, I did make a BIG mess with all that food colouring – check out my hands!

  031

Tuesday 29 March 2011

Left Over Cake

What to do with left over cake?  There are a million and one different things that you can do, but this one would have to be one of my family’s favourites.  I often have trimmings left over from my sculpted cakes, and after events like the Annual Nana Glen Market Day, I usually have a heap of left over cupcakes (over catering is in my blood!)  Sometimes I freeze them for the girls’ school snack or afternoon tea, other times I make cake balls, but now that the weather is cooling down, cake pudding is well and truly back on the menu!  It is super easy, super yummy, and microwaves up a treat for breakfast if I  really feel like spoiling the kids!

First of all, preheat your oven to 180oC, then grease a deep baking dish.  Next break up all your left over cake into chunks.  If it is plain cake, I like to throw in chocolate chips or jam dollops to really make it delicious!

Now all you need to do is make a quick baked custard mix.  I do this by whisking together 4-5 eggs, 3 tablespoons of sugar, a teaspoon of vanilla and a pinch of salt.  Once they are mixed in really well and the sugar is almost dissolved, add 900ml milk.  Mix it in thoroughly then pour it over the cake.

Finally, take a larger baking dish and put a tea towel or cloth in the bottom, place the dish with the cake inside, then pour boiling water into the larger dish until it comes halfway up the sides of the smaller dish to make a water bath.  Place them in the oven and bake for 45 minutes to one hour, or until the custard has set.


All that’s left to do now is serve it up and tuck in!  It is especially yummy with whipped cream or ice cream!  The bits on top that are poking out of the custard go all crispy and crunchy while the rest of it is a beautiful pudding consistency.


Super quick, super easy, and super yum!

PS Sorry the photos aren’t very good, but it was late on a school night and I was rushing!

What is your favourite way to use up left over cake?

Monday 28 March 2011

Harmony Day 2011


Having spent 9 years of my childhood living overseas in various countries, multiculturalism is a subject very close to my heart.  I was fortunate to grow up with friends from all over the world, many of whom I still keep in touch with today.  At the International Schools that I attended, United Nations Day was one of the biggest and most anticipated celebrations of the year.  We all wore national costume (there were almost 70 nationalities at the schools) and the parents set up stands with traditional foods from their own countries for all us kids to try.  (Funny how few people actually enjoyed our vegemite sandwiches though!)  Now that I have 2 young children of my own, I work hard to instil empathy and appreciation of other cultures in them.  I really think that understanding other cultures helps to prevent cultural disharmony, and I think that food is one of the best vehicles to cross the divide.

047Two years ago when my youngest daughter was at the Nana Glen Preschool, I was introduced to Harmony Day when they put on a special lunch.  The Mum’s were asked to bring in a plate of food from their own heritage.  Not having grown up on traditional Aussie tucker, I decided to take in mini cupcakes each with a different coloured person on top, in keeping with the Harmony Day posters.  Being cake, and brightly coloured, they were a big hit with the kids.

This year, I was lucky enough to be able to provide the Coffs Harbour Library with mini cupcakes for their Harmony Day Family Morning Tea and Story Time.  Also, a very dear friend of mine who works at Southern Cross University invited me to be involved with their celebrations.  Another big fan of cupcakes (let’s face it…who isn’t!) she thought that cupcake decorating would be a great way to bring people together.  So, I baked 100 chocolate and vanilla cupcakes, made a mountain of icing and we went and bought a stack of lollies and sprinkles.  We set up a couple of big tables and let the students go for it.  It was fantastic!  They all had a ball.  It was such a hit in fact, that we made the local news with NBN reporter Clare Deligny even decorating a cupcake for the camera!  Check out the video here!

I took lots of photos of all the marvelous cupcake creations and their artists, so if you were there on the day, have a look here for your photo and feel free to send a link to all of your friends!  Also send me your name and I’ll tag you in the photo.

Happy Harmony Day everyone!

Saturday 5 March 2011

Seashells by the Sea Shore.

This was for a beachside wedding.

001    002


Baby Blocks

And for a little girl’s Christening…

033

Monday 28 February 2011

Yes, I love cake!

Okay, I admit it, I love cake.  I’m not a big cake eater, but I am still a cake lover.  They are such beautiful things to look at and I love to dream about all the different flavour combinations out there.  They are lots of fun to make and can be decorated in a gazillion ways.  I’m guessing I’m not alone in my passion, whether you love cake to eat, to look at, or to bake, use cake lovers come in all types!

Look what I found by Easy Cake Ideas!  The perfect way to declare your love to the world!  You can choose from t-shirts, bags and aprons and they have heaps of cool sayings too, like “A Life Without Cake is No Life At All”, “Save The Earth, It’s The Only Planet With Cake”, “Love, A Temporary Insanity Cured With Love”, “Is Life Worth Living?  It All Depends on The Cake” and “Nothing Great Was Ever Achieved Without Cake”.  Or, you can keep it plain and simple with


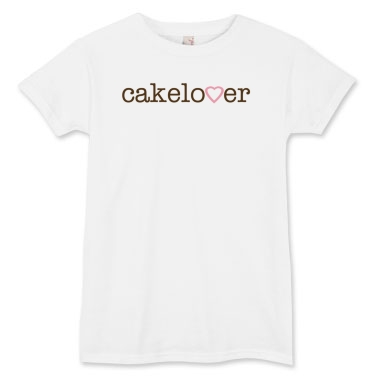
Which one is your favourite?

The Importance of Sharing a Meal

I come from a family who sits down and shares a meal together every night.  No TV, no balancing plates on your lap, and no shovelling grub in to your face.  We all sit around the table together and no one starts until everyone is seated.  We don’t say Grace, but we do always thank the cook for their hard work.  As we eat, we chat together and discuss our day.  We talk about school and work and what we want to do on the weekend.  If there is something the family needs to talk about, it is a comfortable environment to bring it up in.  Fears can be resolved and accomplishments celebrated.  At the end of the meal, no one leaves the table until everyone has finished eating.

This is a tradition that I was brought up with, thinking that was how everyone ate.  I’ve since found out it isn’t so.  I have however tried to instil its importance in my own children.  As my husband is a shift worker, we see it as a treat when he can sit down and join us for a meal.  It turns out that this special family time shared over a meal is actually of significant cultural importance!

Last year, UNESCO (the United Nations Educational, Scientific and Cultural Organisation) recognised the cultural significance of the French Gastronomic Meal.  It has been designated as a cultural icon alongside flamenco and acupuncture as significant components of a culture to be protected.  Incorporating 5 or so courses of food, carefully matched to wine, it is about so much more than just the meal on the table.  It recognises the importance of loved ones and family preparing and sharing a meal together, and the role of food in celebrating major milestones in life such as weddings, baptisms, birthdays and the like.

The French do not lay sole claim to this prestigious cultural honour, the Mexican Michoacan cuisine and the Mediterranean diet have also been recognised and protected for future generations.

Where does the importance of food fit in your family’s traditions?  Do you only eat certain foods at particular celebrations?  Do you have rituals around the food you eat?  Or, do you think it’s a whole lot of nonsense over something you do just to sustain yourself?

Recipe–Grape Pate de Fruit

Last year we planted a vine to run along our front verandah.  The idea was that it would shade the kitchen windows in summer with its foliage, and let the winter sun through to warm us up when the leaves dropped.  As we like to have multi tasking plants where possible, we decided to put in an edible grape.  We opted for a green one so that we wouldn’t have to worry about the wooden decking getting stained from falling fruit.

This summer we have enjoyed our first crop.  The vine has grown like crazy and does a fantastic  job of keeping the direct sun out of the front of the house, not to mention that the greenery right outside the large windows looks lovely from inside the house, and softens the look of the building from the street too.   The vine was so heavy with fruit that we had to cut off many of the immature bunches which the chooks were more than happy to gobble up!  Unfortunately, although they tasted beautiful, the texture was a bit spongey.  Having never grown grapes before, we weren’t sure if it was something we had done wrong or not, but put it down to the crazy weather we have had this summer.  Our days have been fluctuating back and forth between 42oC with 80% humidity, to 20oC only 2 days later!  It’s put some of the chickens off the lay and is definately taking its toll on the kids’ tempers too!


As a result, we had a couple of kilos of fruit that tasted great but weren’t any good to eat, so what to do?  Once again, Google to the rescue!  I found a few references to Canelle et Vanille, one of my favourite food blogs.  I figured they would definately know what they were doing, so I converted their recipe for Strawberry Pate de Fruit to Grape Pate de Fruit.

It was a weekend, so I had my two trusty helpers home to lend a hand, so we pureed the fruit, boiled it up with the sugar and pectin then let it sit.  Luckily it didn’t take any where near as long to set as I thought it would (but much longer than Madeleine wanted!).  It turned out of the silicon pan beautifully and we coated it with just normal white sugar.  Next time though I think I’ll use caster sugar as it is just that little bit finer.  They tasted beautiful, you could really taste the grape in them and the texture was lovely, not at all rubbery.  You can find a printer friendly version of the recipe here.  The girls and I can’t wait to make them again and were thinking raspberries will definately be worth trying.  Have you made these before?  What flavours do you think would work well?

Tuesday 22 February 2011

Our Smallest Egg Ever!

For those of you who know us, you might remember our HUUUUUGE chicken egg laid by one of our Ancona hens just over a year ago (December 2009).  For everyone else, here is a photo of the whopper…

It was something ridiculous like 8cm long!  Now, for the other end of the scale.  Just when we thought we had seen just about everything, Matthew returned from the hen house the other day (no, not the dog house…this time…) with this little cutie in tow.


Yep, that’s 3cm folks!  A mere 1.18 inch!  Here it is sitting in his wedding ring and with some other “normal” chicken eggs:


And for comparison’s sake, here it is in my hand, side by side with the whopper!


I’d love to hear about your most unusual “garden produce”…

Recipe–Turkish Bread

Today I am going to share with you one of my favourite bread recipes ever!  It is from Greg and Lucy Malouf’s book Turquoise - A Chef’s Travels in Turkey.  I highly recommend this book.  It is admittedly one of the more expensive books in my collection, but you certainly get what you pay for, and more.  The recipes are all fantastic and quickly become family favourites.  There are also plenty of stunning photographs and beautiful little travel tidbits too.  I always like to hear the stories behind recipes and growing up travelling the world, I love to sit and day dream of far off exotic places (and meals!!)

One of the great things about this particular recipe is its versatility.  You can use it to make gorgeous sandwiches, slice it in thick “fingers” and dip it into balsamic vinegar and olive oil, serve it with olive oil and dukkah, make bruscetta, use it as a pizza base, or make Turkish pide pies.

So without further ado, here it is:

1 tablespoon yeast

pinch sugar

375ml warm water

480g bread flour

1 teaspoon salt

60ml olive oil

1 egg

25ml milk

nigella or sesame seeds

Dissolve the yeast and sugar in 125ml of the water and set aside for 10 minutes or until frothy.  Mix in 90g of the flour to form the “sponge” and set it aside somewhere warm for 30 minutes.

After letting it rest, add the remainder of the flour & water along with the salt and olive oil.  Mix it in your mixer with a dough hook on low for around 10 to 15 minutes.  Don’t panic – it is a really wet mix.  Now you need to let is sit somewhere warm for an hour to rise.

Once it has doubled in size, turn it out on to a very well floured bench and shape into 2 long logs.  Gently place them onto lined, greased or floured trays and sit for another half an hour.

Finally, combine the egg and milk and brush over the loaves then sprinkle them with the seeds.  Preheat your oven to its hottest setting (I do mine at 250oC with the fan on) and cook them for 8 to 10 minutes or until golden brown and they should sound hollow when you tap them on the bottom.  Finally, allow a good 10 minutes or so of cooling time before you cut into them so the bread doesn’t collapse in on itself.

Enjoy!

Tuesday 15 February 2011

Making Sausages

Okay, so this week’s write up is not cake related, but is still all about food.  Last Tuesday Matthew and I were invited to Evan and Shelley’s property out at Copmanhurst on the other side of Grafton.  The boys work together and we are all super passionate about food.  Like us, they are trying to get their own veggies growing and fruit trees in.  As they have 100 acres, they are also raising animals for meat which brings us to today’s post.  Evan kept the hind half of his first pig for making sausages.

So, once the kids were on the school bus, we piled into the car with a mountain of salt, a variety of spices, my Kenwood mixer (with mincer and sausage extruder attachments) and loads of enthusiasm.  As we turned into their property we were amazed at the recent storm damage which had carved massive holes into the road and parts of it had caved in.  Lucky we took the Pajero!


Sausage Making Resized (5) Sausage Making Resized (9)


On arrival, we were welcomed in.  First we had to unload the Muscovy ducks and Naked Neck chickens we had brought for their flock.  Once inside though, the hospitality was really turned on.  Evan supplied us with glass after glass of thick, luscious coffee with an amazing dense crema on top.   We had been hearing all about his coffee machine for months, so it was quite a treat to finally get to sample it’s coffee!  It was certainly everything he said it would be!


Sausage Making Resized (31) Sausage Making Resized (33)


After a little trepidation, and standing around looking at each other wondering how we were going to go about it all as none of us have ever made sausages before, we finally dove in.


Sausage Making Resized (35)


The boys took charge of carving the meat off the bones and us girls chopped it into pieces small enough to put through the mincers.


Sausage Making Resized (11) Sausage Making Resized (37)


Matthew was the first to cut himself – slicing his finger right through to the bone.  We picked on him a bit for doing anything to get out of the work, but figured he could sit and watch once we realised it wasn’t going to stop bleeding!  I was next as I nicked a chunk out of my knuckle.  Luckily with a really tightly applied bandaid, I was able to soldier on.  To Evan’s credit, the knives were incredibly sharp – I didn’t even feel it when I cut myself!

Once the meat had all been diced, we cleaned up and Shelley served up a gorgeous lunch of pickings.  We had grilled Chorizo and another spicy sausage, cheese, and fresh fruit, all washed down with an icy cold beer!   Just as Matthew and I looked at each other and thought if they keep looking after us this well, we’ll never leave, it was back to work.


Sausage Making Resized (12)


We set out two mixers up side by side on the stainless steel trolley.  I have a Kenwood Chef and Shelley has a Kitchenaid.  I was really looking forward to seeing the Kitchenaid in action as I have heard so many rave reviews about them – and lets face it, they come in so many pretty colours and are lovely to look at!  The first thing I noticed was that all of the Kitchenaid attachments (including the mincer) were plastic as opposed to the Kenwood’s alloy fittings.  The Kenwood also had 3 different sized mincing discs to the Kitchenaid’s two.  While they both did a great job of mincing, it was much more fiddly with the Kitchenaid as the feeder tray was just too small to be practical.  You pretty much had to feed the meat straight into the tube of the mincer.  With my Kenwood, you were able to pile up a heap of meat on the feeder tray which made life much easier when operating it on your own.


Sausage Making Resized (14) Sausage Making Resized (15)


Once the meat had all been through the coarse grind, we added our seasonings to the first batch to make a coarse grained Fennel & Chilli salami.  We had put aside some diced fat which we then folded through at this stage also.


Sausage Making Resized (18) Sausage Making Resized (13)


Next job was the casings.  Shelley had bought a big pack of natural pig casings from their local butcher which were already prepped.  All we had to do was soak them in water and lemon juice and change the water a few times to get rid of the excess salt from the brine they were preserved in.


Sausage Making Resized (17) Sausage Making Resized (16) Sausage Making Resized (19)


Once they had been soaked sufficiently, we threaded them on to the extruders on the mixers.  I must say, Matthew was quite adept at this particular manoeuver!  Must have been all those years in the Navy! lol!  Yes, there were lots of giggles and snide remarks flying around the room as we stood back and watched!


Sausage Making Resized (21) Sausage Making Resized (22)


When we turned them on and started stuffing the casings, we really saw the difference in the two mixers.  The Kenwood was pushing out the meat at a very steady rate (which can be adjusted with the speed dial), while maintaining the textural integrity of the meat.  The Kitchenaid however was emulsifying the meat at turning it into a smooth paste, so we abandoned use of the Kitchenaid and only used the Kenwood for stuffing the casings.

We were all amazed at how easy this part of the operation was.  We all thought that stuffing them would be the most difficult part, but it was really quite straight forward.  And, I have to say, I was quite impressed with my sausage twisting and bundling capabilities – must be in the blood (my grandfather was a butcher).


Sausage Making Resized (25) Sausage Making Resized (24)


As these first sausages were a salami style and had to be air dried, we tied them off with natural fibre string between each sausage where they were twisted, and pierced any air bubbles that we could see.


Sausage Making Resized (29)


The final stage is to hang them up to dry for 6 to 12 weeks.


Sausage Making Resized (32)


The next batch we made were a spicy Italian sausage (to be eaten fresh) and our version of a Chorizo.  The Chorizo is supposed to have a high salt content for drying and preservation, and the addition of a bacterial culture to ferment the meat, however being our first attempt at sausages, we didn’t want to hang them all to dry in case they didn’t work out, so we reduced the amount of salt and omitted the culture all together.

By the end of the exercise, we had about 75 sausages for each family, and oh my, don’t they taste awesome!  I was amazed at how easy it all was, and really can’t see myself buying sausages from the shops again knowing how good they are when you make them yourself.  We were also discussing the idea of making up the spiced mince and then making it into hamburger patties if you couldn’t be bothered stuffing them.


Last but certainly not least, I brought home half of the bones and made THE most delicious bolognaise sauce ever!


Sausage Making Resized (28)


All in all, a wonderful adventure!  I really hope we get invited back for their next pig!


Sausage Making Resized (26) Sausage Making Resized (27)